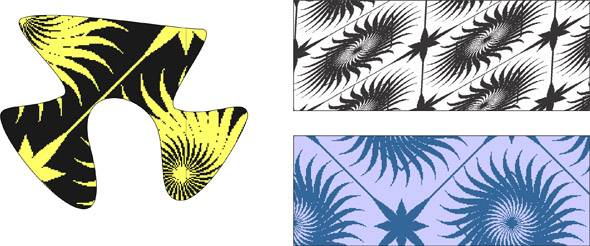
In this tutorial I will show you how to create a seamless Background in CorelDraw.The most important thing that you will learn is how to use SNAP tools to make more precise vector shapes and How to make and work with Patterns.

1. Making an element for Pattern
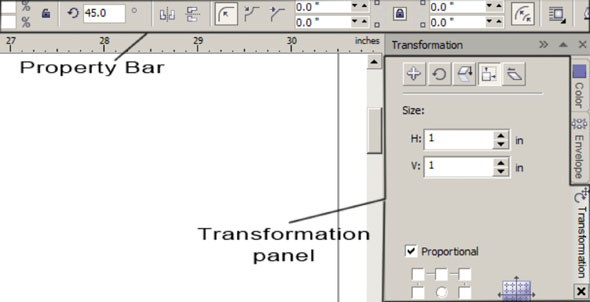
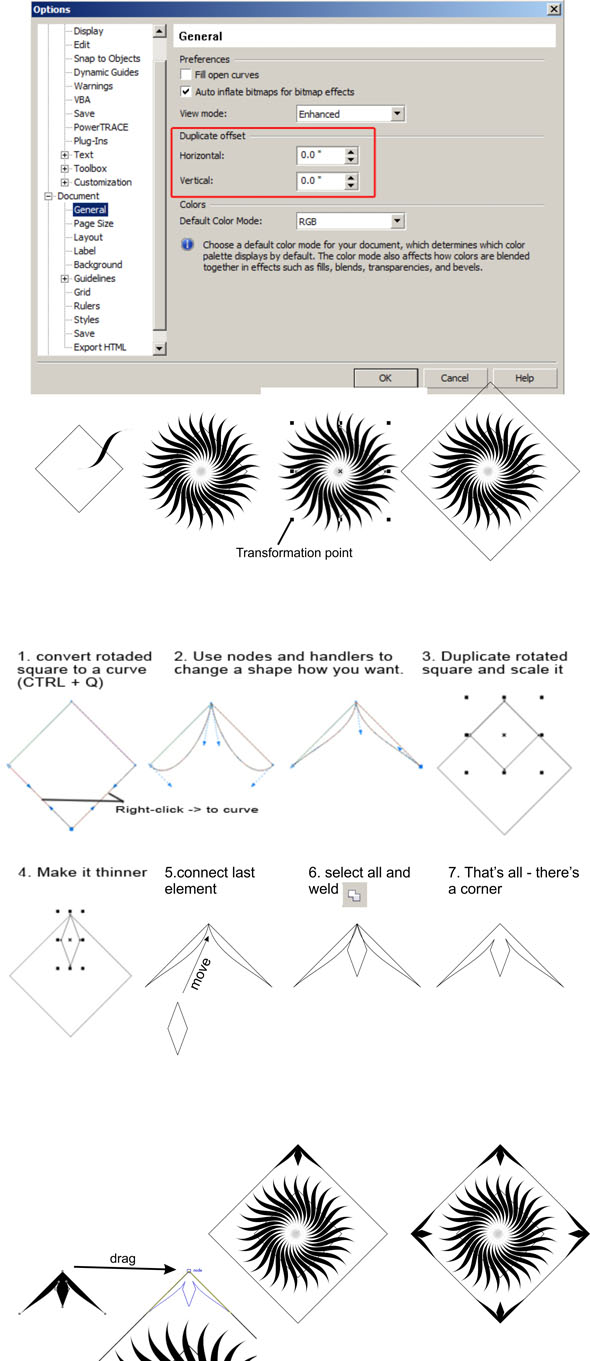
Firstly, open new document and save it for example “Background.cdr”. Now we will draw own element that will be in a background so create a square with a rectangle tool (F6). Press hold down CTRL key , press left mouse button and drag – it makes a square. Now open Size transformation panel ( Arrange -> Transformations -> Size) or ( ALT + F10). Change Width and Length to 1 unit for precision. Rotate a square by 45 degrees in property bar.
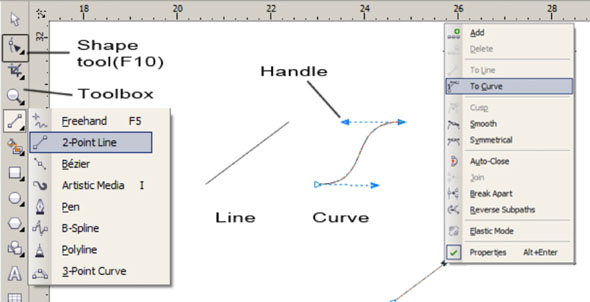
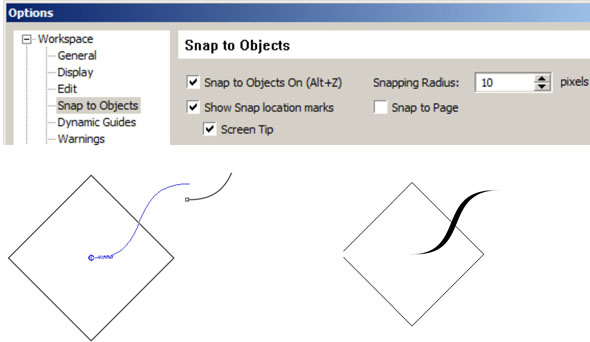
Now draw a curved line something similar like me. First draw line with 2-points line tool and with Shape tool(F10) right-click on line and choose “To curve”. This makes a curve from straight line. Curve Handles appear so grab one and drag to a curved line.Now make sure that Snap to object is on ( Tools -> options -> Snap to objects or ALT+Z). If Snap to objects is on grab curve from its node and drag to the center of rotated square. You will see it’s snapping then you drag near the center of square.
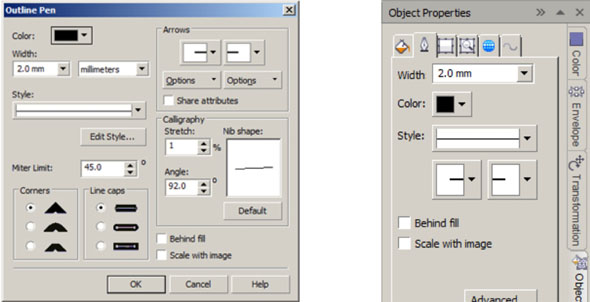
Now select curve and open Properies panel (Windows -> dockers -> Properties or Alt + Enter). Choose Outline properties and set width to 2 units. Now click on advanced options and new window appears. Set in Calligraphy settings Stretch to 1% and Angle to 92 degrees and click OK. Now we have convert that curved caligraphy line to object ( Arrange -> Convert outline to object or CTRL + SHIFT + Q).
Now select curve and open Rotate Transformation panel (Windows -> dockers -> Transformations -> Rotate or Alt + F8). Set angle to 12 degrees, Pivot point choose bottom left one and copies 12 and click apply. Now duplicate rotated square (edit -> duplicate or CTRL + D) and resize it by holding SHIFT key and dragging transformation point.When you duplicate objects for the first time in CorelDRAW, the Duplicate offset dialog box appears. To specify the distance between the duplicate and the original object along the x-axis and y-axis, type values in the Horizontal offset and Vertical offset boxes.You can change the default offset for duplicates at any time. To do this, go to (Tools -> Options -> Document -> General )v and type values in the Horizontal offset and Vertical offset boxes. Now duplicate one more that square and make a decorative angle something like I did. And then duplicate rotate and drag from node to node to the corners. Snapping helps to do it precisely. well we have an Element.
2. Making and working with a Pattern
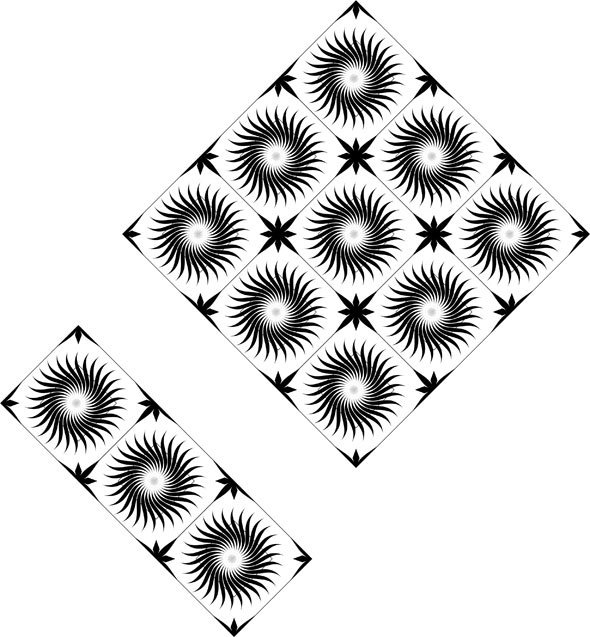
Now we will make a pattern which we could use for the backgrounds or to fill other shapes. Now group all shapes of the element (Arrange -> group or CTRL + G) make a dublicates and drag from node to node as we did before.
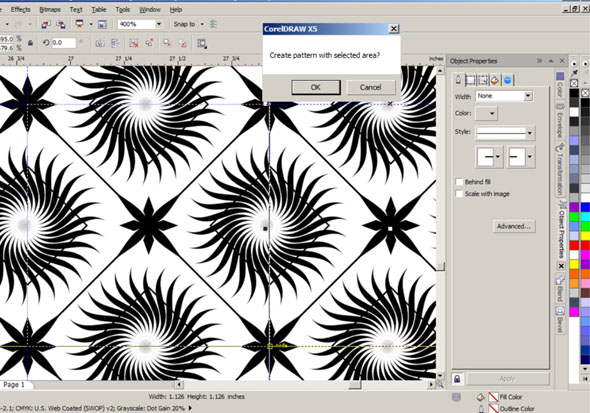
Well the last step is to create a pattern. To do it go to Tools -> Create -> Pattern Fill. choose two color type and high resolution. Then you will get a marque tool, hold CTRL key to make a square selection, press and drag to select the zone of the pattern.To select that zone precisely draw guidelines ( Drag from right and top rulers) and then move the cursor on intersection (guideline turn to yellow then you are on it). that’s all we have created a pattern and can use it.
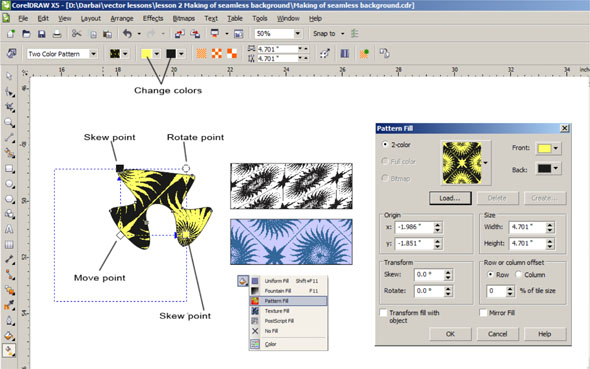
Well now we can use this Pattern for backgrounds ir filling any shapes. So try it. Draw some custom shapes and select one.Go to toolbox and choose 2-color type pattern fill .The new window appear. Choose the new created Pattern and click OK. Shape will fill with the Pattern. Now choose Interactive fill tool (G) , click on shape and Pattern Gizmo appears. This gizmo can manipulate with the pattern. It has Move, Skew and rotate Points. Drag it and the pattern will change.
That’s all the lesson is finished.There are some examples with Pattern fills.


